So I ended up winning the Bartertown Sci-Fi Painting Competition and as compensation for placing first I won some cashola along with being able to choose a prize pack consisting of three items from a group of Bartertown advertisers. One of those pics was a credit with Dragonforge Studios. So I picked up some resin bases from Jeff and of course while shopping on his site ordered myself some additional goodies.
One of those was the Hero Base set from his Lost Empires range. Absolutely love these sculpts, and price wise they beat anything being produced anywhere else. Don't get me wrong, I'm still a major fan of the Micro Art Studio bases, but Jeff has got my attention, favor, AND business with his bases. See Jeff there's some more product pushing for you! I highly recommend his products (more shameless advertising...) ;-)
 So here's a Dragonforge shot of the base I'm working with done in his paint scheme. I'm working with the larger 40mm base on the left for this tutorial. For the most part I really liked the scheme that the studio used so I'm going to replicate it to a point.
I've got the model that is going to sit on this beast of a base as well. I picked up in my prize package the 2008 Games Day Space Marine Captain and the combination of the running pose with that big honkin' thunder hammer just screamed Vanguard conversion. So obviously I must answer the inner call to convert a model. Nice thing about that mini is the arms, and head are separate pieces so I can easily swap out the head for a nice Pre-Heresy Masked head from Chapterhouse Studios...SCORE!!!
Totorial Time!
Prep - Wash the model in cool soapy water and let dry overnight. I use a brush-on priming technique for display quality models so I used Foundation Astronomicon Grey to prime the base, again let dry overnight then hit it again and then let that dry a couple of hours. Ready to go!

First shot - Snakebite Leather used to base coat the tile surface and the statue face. Make sure you get all the cracks and crevices. I used this straight from the bottle, no thinning down. I did only a single coat on this as I wanted some fading on the base coat for effect.


Third shot - Fairly heavy dry-brush of Bleached Bone (3-layers) again straight from the pot (NOTE - most of my dry-brushing is straight from the pot unless I'm going a "wet" brush technique at which point I think 1:1 with water).

Fourth shot - Light dry-brush with Skull White (1-layer) just over the edges to accentuate the lines.
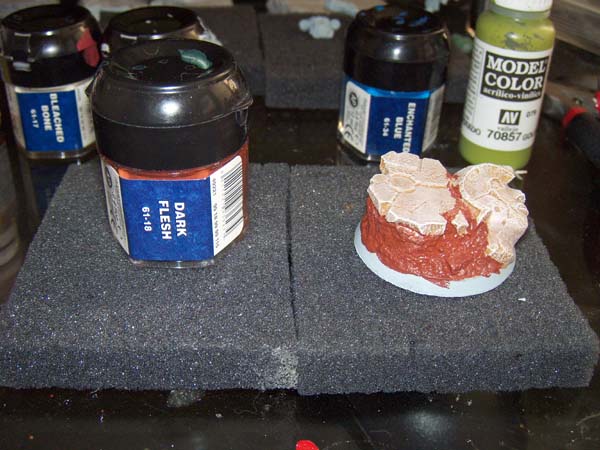

Fifth shot - Dark Flesh straight from the pot, carefully hit the cracks between the tile and the statue head. I did have to water this down a bit as this series of paint from GW was unusually thick.

Sixth shot - Seem to have lost some pics that or I fogot to shoot the progression stages for the Dark Flesh, however this is where i stared dry-brushing over the Dark Flesh and blended in some of the texture colors over the tiles and statue head. In otherwords, once the Dark Flesh was fully dry from the first coat I took and wet-blended the stages of Bleached Bone and Skull White by taking a detail brush and adding a line of Dark Flesh along the borders of the Dark Flesh and the tile and statue head BEFORE beginning the dry-brushing of the lighter colors. This created a nice effect along the borders.
So I forgot to take any pics of the progression of the final dry-brushing layers. If you see in the "Sixth shot" the Enchanted Blue and the Vallejo Model Color (70857) Golden Olive. The dry-brushing here was more a blotting technique to add some faded marbling to the stone. I also used the Enchanted Blue in the circle on the tile floor. Finally the Eyes were filled in with Black then highlighted to look like Opals and the jewel on the forehead of the face was done in a red jewel technique then a light dry-brushing of Bleached Bone was done over the jewel and eyes to depict dust covering. Black border and a few coats of Matte and VIOLA!

Check back on the site to see what happened when I mounted the Vanguard Conversion!
-BJC
No comments:
Post a Comment